From Checkout to Portal in Under 60 Seconds
In my grocery business, I used to manually send delivery time SMSs.
I’d get the delivery schedule from our routing software. Open my SMS platform. Type each customer’s phone number. Copy-paste their delivery window. Send. Repeat for 60 customers. Then do it all again the morning of their delivery as a reminder.
Took me an hour. Twice a week.
Then I built an integration. As soon as a delivery was added to the route, WordPress triggered the SMS automatically. Morning of delivery, another SMS fired. No manual work. Zero forgotten notifications.
At the time, Pizza Hut were the only ones doing this. Now it’s the minimum expectation.
That’s what automated communication looks like. Instant. Consistent. Reliable.
And when I look at wellness practitioner websites now, I see the opposite. “Allow 48 hours for portal access.” “You’ll receive login details within 1-2 business days.”
Nobody delays 48 hours if it’s automatic.
That delay tells me exactly what’s happening behind the scenes: manual account creation, manual email sending, manual access granting. Someone logging into WordPress admin at 11pm to process enrollments from the day.
The same pattern I had before I built proper systems.
From Planning to Reality
In Part 1, I showed you the blueprints. The before/after customer journey maps. The system architecture diagram showing how every piece connects.
This is Part 2: watching it actually work.
We’re focusing on the first 60 seconds of the client journey. The moment that determines whether a new client feels confident and ready to start, or confused and wondering if they made a mistake.
Purchase → Welcome → Portal Access.
Get this right and everything else flows. Get it wrong and you’re fighting friction from day one.
The Real Problem
The wellness practitioners I talk to all describe the same overwhelm.
It’s not that any single task is difficult. Creating a WordPress account takes two minutes. Sending a welcome email takes three minutes. Granting portal access takes another minute.
It’s that you have to remember all the steps. In the right order. Every single time. While also running your actual business.
And when something breaks—password reset emails going to spam, portal access not granted, welcome email stuck in drafts—you’re the one who has to figure it out. Drop what you’re doing. Learn something new. Fix the issue. Hope it doesn’t happen again.
That’s the part that grinds you down.
My grocery business had the same pattern. The manual work was manageable when we had 20 customers. At 100 customers, it was painful. At 400 customers, it was impossible without proper automation.
Building systems isn’t about being lazy. It’s about being consistent when you scale.
What I Built: The Client Journey in Action
This platform automates the entire enrollment sequence. Zero manual work. Zero steps to forget.
Here’s what happens when a client purchases a program.
Step 1: The Checkout Page
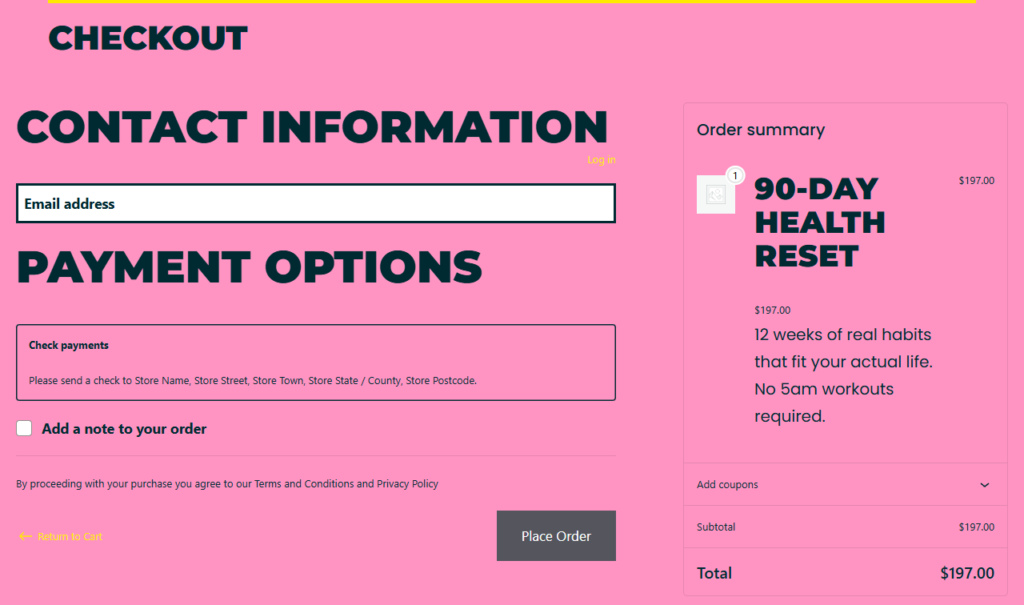
Simplified checkout – just email for digital products. No unnecessary friction.
This is what the client sees when they decide to purchase.
I’ve stripped it down to essentials. For digital products like coaching programs, there’s no need for shipping addresses or company names. Just name and email.
The fewer fields, the less friction. Friction kills conversions.
This is a simple WooCommerce filter hook—about 10 lines of code—that removes unnecessary fields when a product is marked as virtual. But the impact is real: faster checkout, fewer abandoned carts, cleaner experience.
Step 2: Order Confirmation

What clients see immediately after purchase – clear next steps and no waiting.
Payment clears. Your client sees the order confirmation page.
Behind the scenes, the moment that order status changes to “processing,” the automation fires.
WordPress creates a user account. Generates a secure random password. Assigns them to the “customer” role. Links their new account to the order they just placed.
Welcome email triggers automatically.
Portal access is granted.
All of this happens in the 5-10 seconds they’re reading the thank you page.
Notice the page tells them exactly what happens next: “Check your email – We’ve sent your login credentials.” They know immediately what to expect. No wondering if it worked.
The Code That Makes It Happen
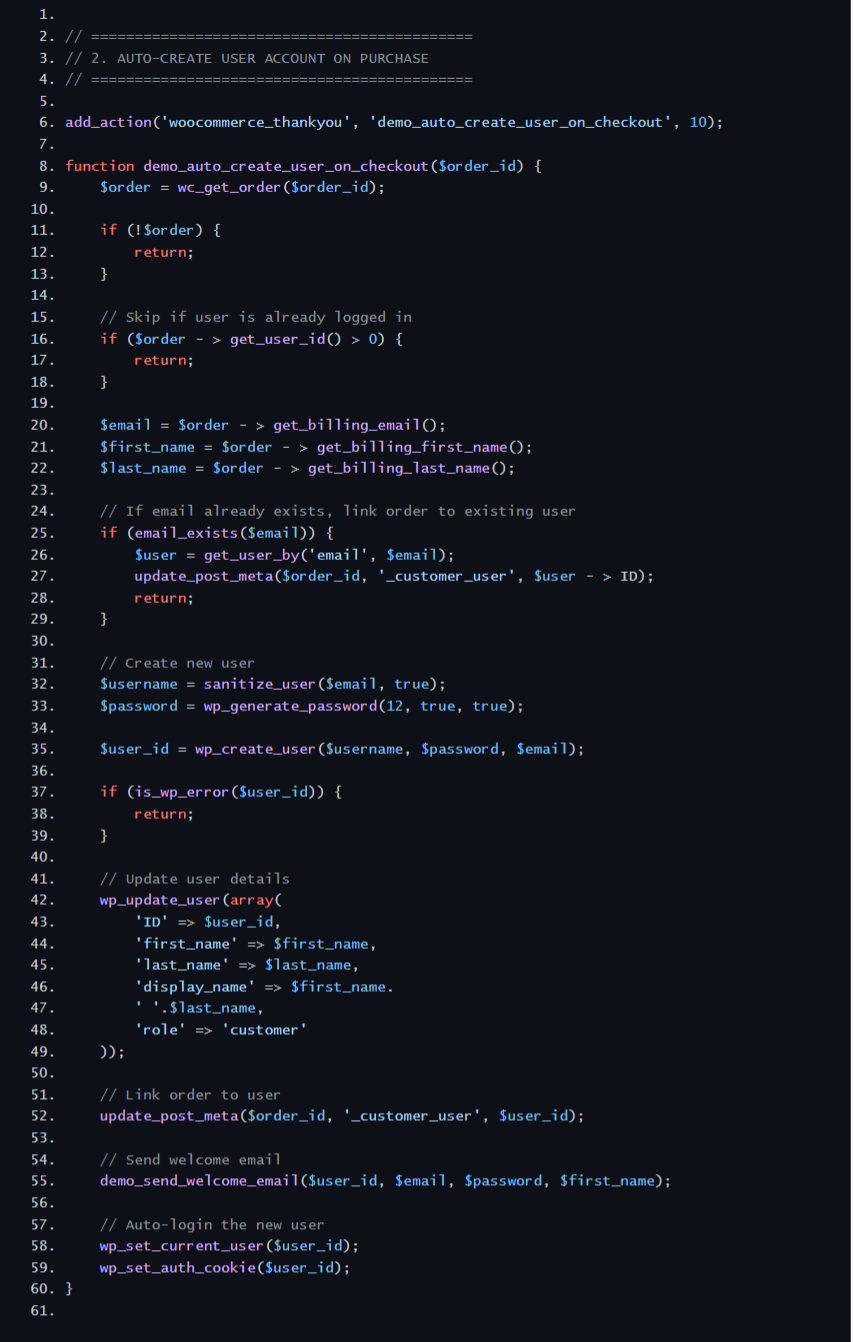
Auto-account creation function – runs automatically on every purchase.
Here’s the actual code running behind the scenes. This function hooks into WooCommerce’s order processing and fires automatically when payment clears.
It checks if a user already exists. If not, it creates one with secure credentials, assigns them the customer role, links the order, and triggers the welcome email.
Sixty lines of code. Eliminates 10-15 minutes of manual work per client. Runs the same way every single time.
This is what I mean by custom systems. Not a plugin you hope works. Actual code that does exactly what your business needs.
Step 3: Welcome Email Arrives
Within 60 seconds of purchase, the welcome email lands in their inbox.
The thank you page already told them to check their email. When they do, it’s waiting.
Plain text. No heavy design. No images that might break or trigger spam filters.
Just clear, helpful information:
- Login credentials
- Portal link
- What to do next
I see a lot of practitioners using fancy HTML email templates. Big headers, brand colours, multiple columns. It looks polished but it feels automated.
Plain text feels like it came from a real person. Because it did.
Also: plain text emails have better deliverability. They don’t get caught in spam filters the way designed emails do.
Important note: This fires directly from WordPress using wp_mail() for the demo. In your build, I can integrate with whatever email platform you’re already using—ActiveCampaign, Mailchimp, ConvertKit—or set up proper SMTP delivery. The point is the trigger happens automatically at the right moment, regardless of which email system sends it.
Step 4: Portal Access (Desktop)
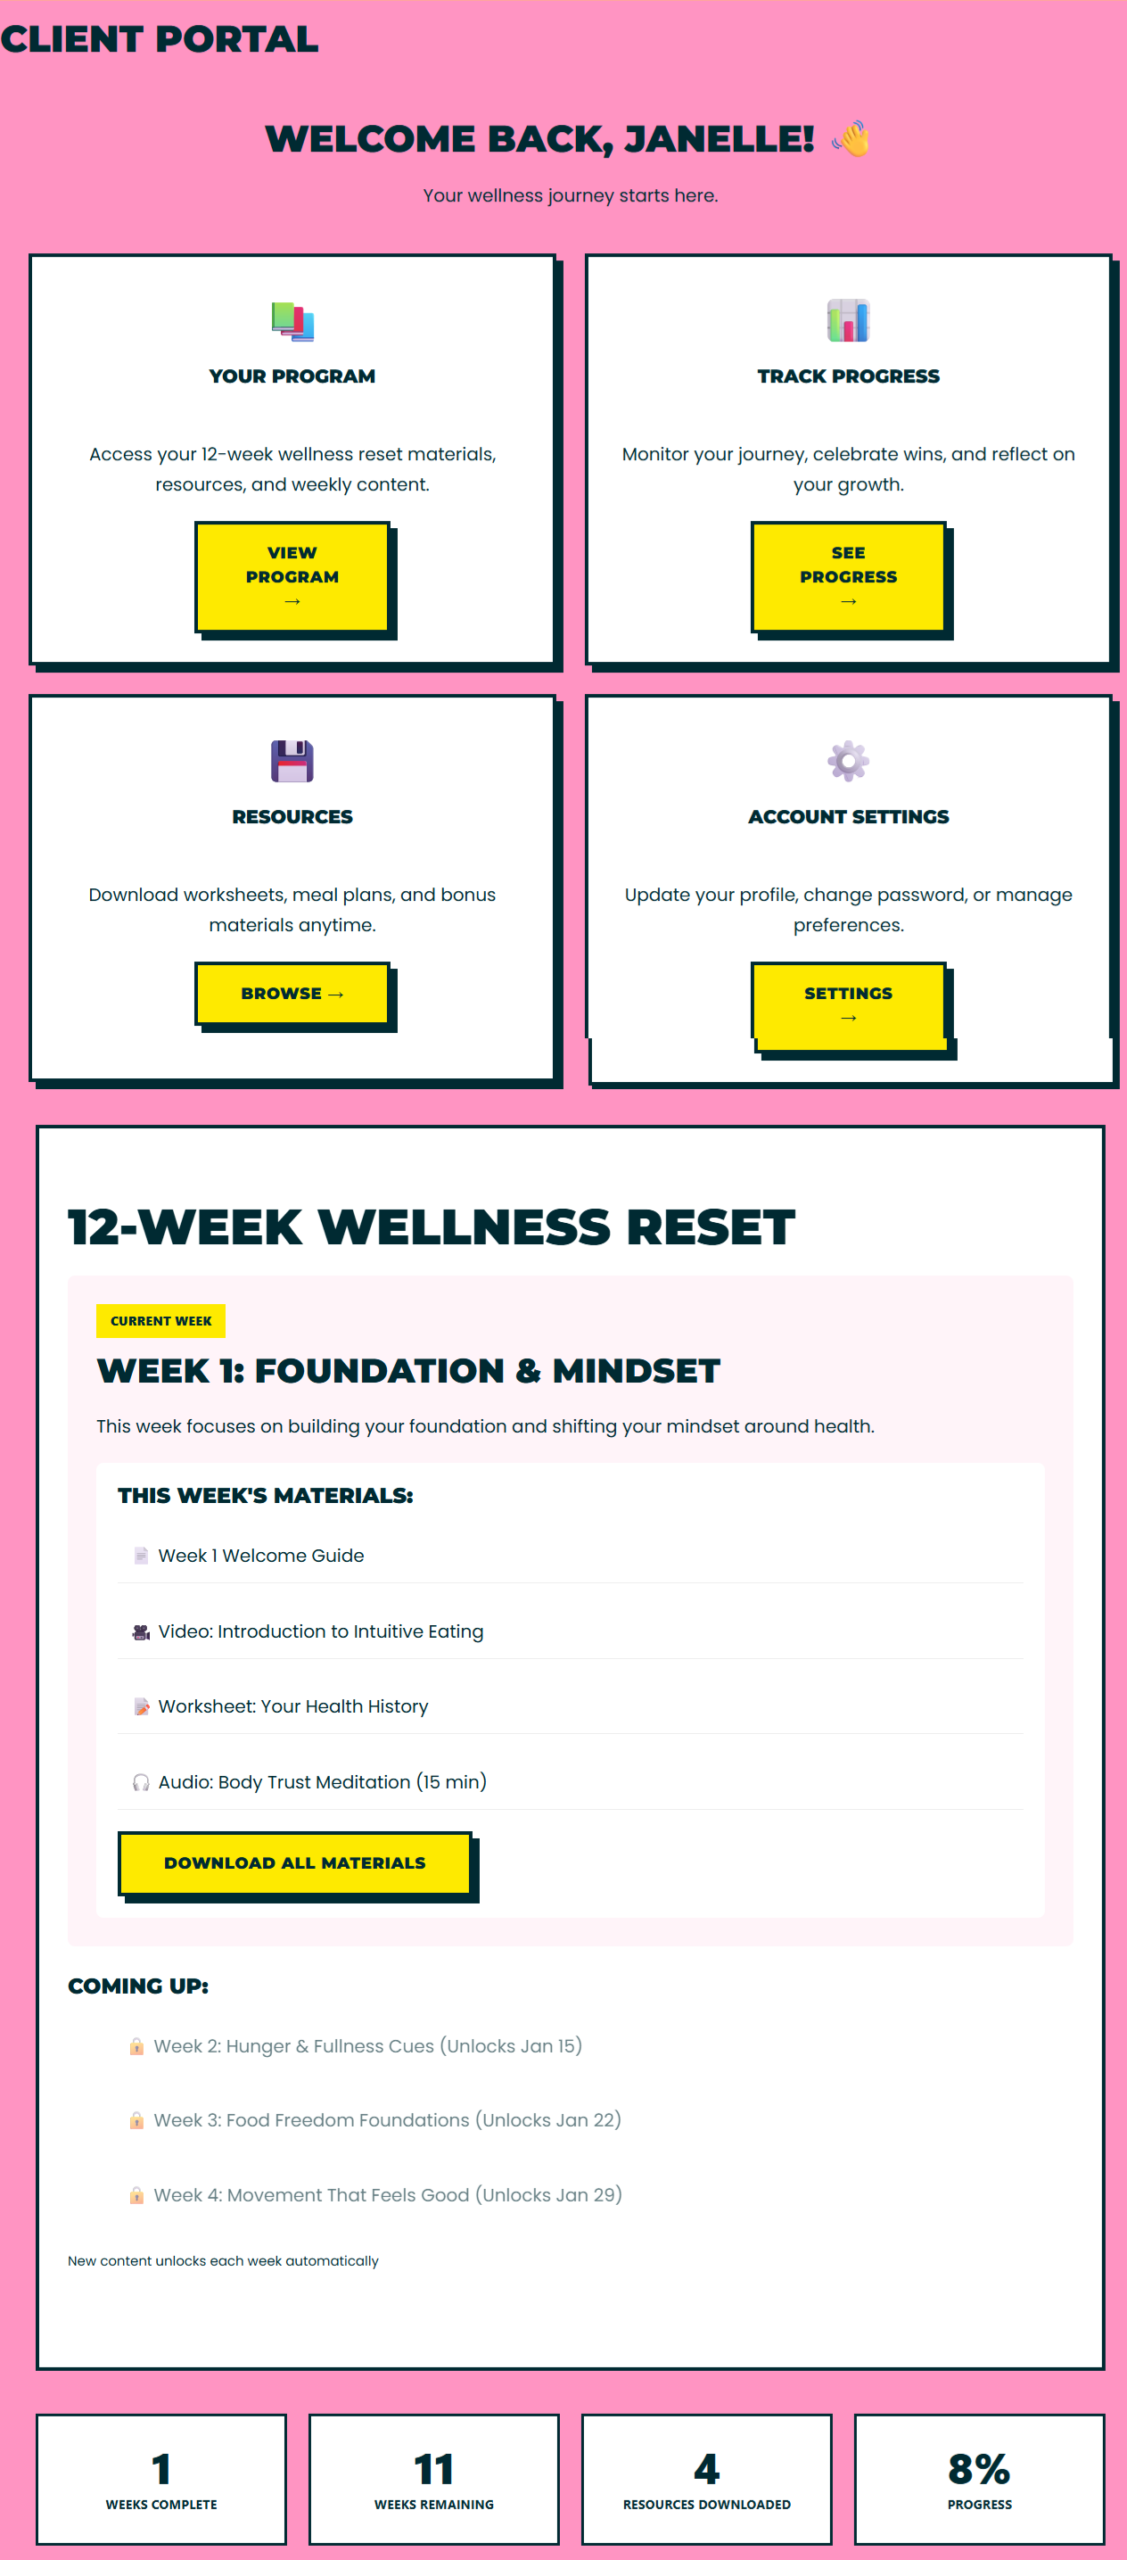
Client portal dashboard – program materials ready immediately after purchase.
Your client clicks the login link. Enters their credentials. This is what they see.
Clean dashboard. Program materials right there. Clear “Start Here” guidance.
No hunting. No wondering “where do I go now?” No confusion about what they have access to.
The portal checks one thing: are you logged in? If yes, you see the dashboard. If no, you see a login prompt.
For this demo, it’s that simple. Every logged-in customer sees the same content because there’s one program being sold.
In your build where you’re selling multiple programs, I’d add purchase-based restrictions—check user meta for which products they bought, show only those materials. But for a single-program platform, basic logged-in access control is sufficient and reliable.
Step 5: Portal Access (Mobile)

Mobile-responsive portal – over half of your clients will use this view.
More than half of your clients will access the portal on their phones.
Same clean interface. Same easy navigation. Fully responsive.
This matters more than people think. If your portal doesn’t work well on mobile, your clients won’t use it. They’ll email you instead. Which defeats the entire purpose of having a self-service portal.
Step 6: Resources Ready to Access
Your client clicks through to their program content.
Everything they need is organized and accessible. Week 1 materials. Week 2 materials. Downloadable resources. Video content.
For the demo, I’ve added sample PDFs and placeholder content to show the structure. In your build, this is where your actual program materials would live—video embeds, worksheet downloads, audio files, whatever you deliver to your clients.
The foundation is there to expand this into a full content management system with drip scheduling, progress tracking, completion certificates. But even in its basic form, it solves the core problem: your clients can access their materials immediately without you manually granting access or sending individual files.
What This Solves
In my grocery business, I had to manually combine orders when someone ordered both recurring and one-off items.
Find the matching addresses in two separate systems. Process refunds for duplicate delivery fees. Create combined packing slips. Make sure they didn’t get duplicate thank-you emails. Ensure their receipts reflected the actual purchase.
Way too many steps. Way too hard to outsource. Too easy to make mistakes.
That’s what happens when you’re working around systems instead of building systems that match your workflow.
This wellness coaching platform does the opposite. The system matches the actual business model:
Before (what I see on wellness sites):
- “Allow 48 hours for portal access”
- Manual account creation when you have time
- Login details sent separately from order confirmation
- Your client waiting, wondering if it worked
- You spending 10-15 minutes per enrollment
- Steps forgotten, access granted incorrectly, emails delayed
After (what this platform does):
- Instant portal access on purchase
- Zero manual account creation
- Login details arrive within 60 seconds
- Your client knows immediately it worked
- Zero minutes per enrollment
- Runs the same way every time, automatically
The difference isn’t just speed. It’s consistency.
Manual processes break when you’re overwhelmed, when it’s late, when you’re distracted. Automated processes run the same way whether you’re asleep or on holiday.
What’s Next: The Business Leverage
This client journey—checkout to portal in 60 seconds—is the foundation.
But here’s where it gets interesting for your business.
In Part 3, I’ll show you the business integrations and coach dashboard that make this actually manageable:
- Payment processing that talks to your accounting software (Stripe → Xero/QuickBooks automatic invoice sync)
- Email platform integration so new clients automatically enter your sequences
- Coach dashboard showing who enrolled, when, what programs they’re in, how they’re progressing
- Automated follow-up for feedback requests, testimonial collection, upsell opportunities
The client journey happens automatically. The business intelligence happens automatically too.
That’s what turns a website into a business system.
And it’s all included in the same build. A platform like this—enrollment automation, client portal, business integrations, coach dashboard—runs around $4,000 USD for a solo practitioner selling 1-3 programs.
Not a monthly fee. Not a subscription. Your platform, your domain, your data, complete ownership.
That’s the difference between template platforms and custom systems. Templates charge you monthly forever. Custom systems are yours.
Ready to Stop Fighting With Half-Baked Systems?
This is what proper systems look like. Not templates you bend yourself to fit. Custom platforms built around your actual workflow.
The kind of automation I built for my grocery business when I finally stopped working around the system and built the system I actually needed.
I only take 3-4 projects per month. Spots for 2026 are filling.
Read the full series:
- Part 1: Planning & System Design – The blueprints
- Part 2: Building the Client Journey (you are here)
- Part 3: System Integration & Business Leverage – Coming soon
This is Part 2 of a 3-part case study series documenting the build of a complete wellness coaching platform. The demo uses a hot pink, bright yellow, and deep teal color palette designed for high-energy coaching businesses. Thrive Wellness Systems builds custom WordPress solutions for wellness practitioners.